
This is an ongoing (and spare time) project to make a robot that rolls over vertical surfaces. It might develop into a window-cleaning robot, or a web-connected bot that lives on my whiteboard and responds to tweets...
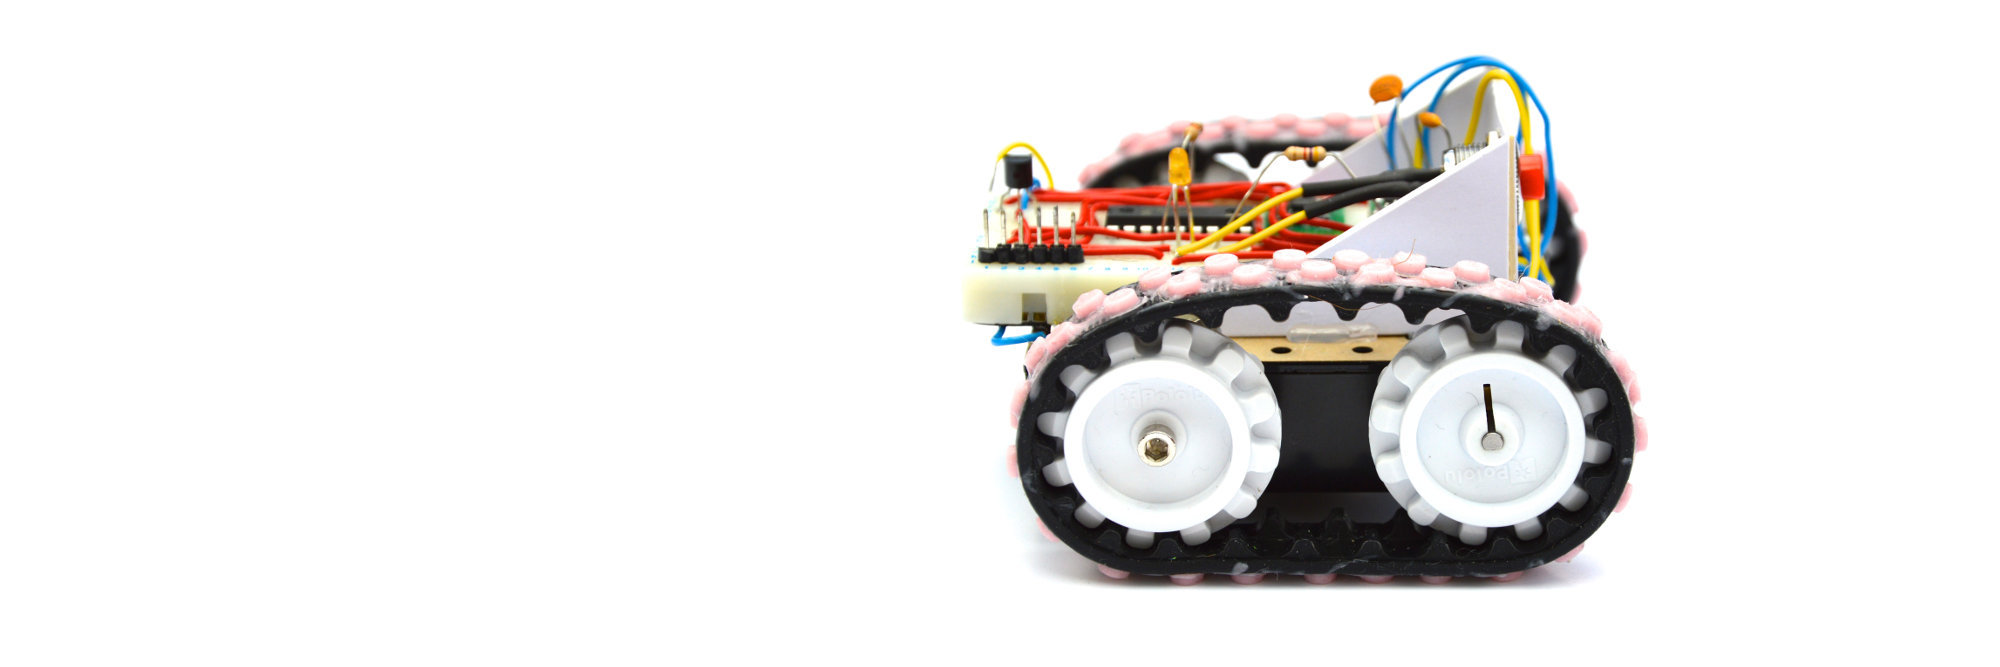
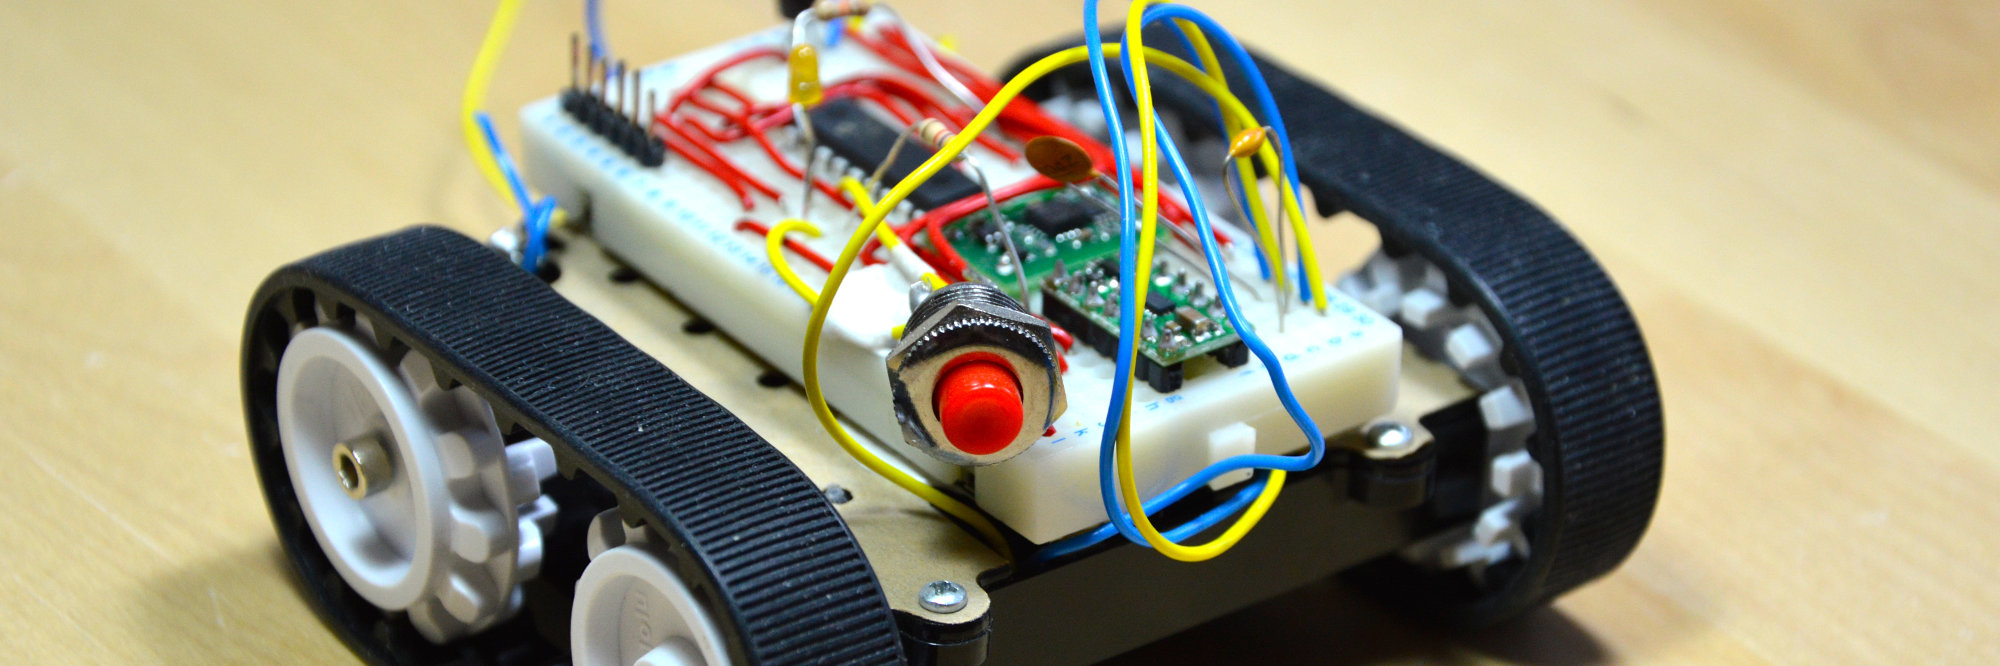
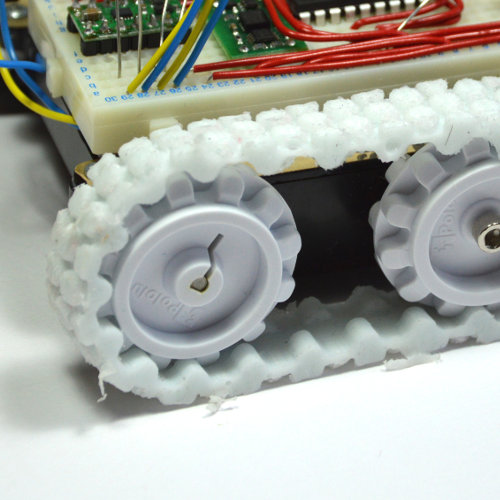
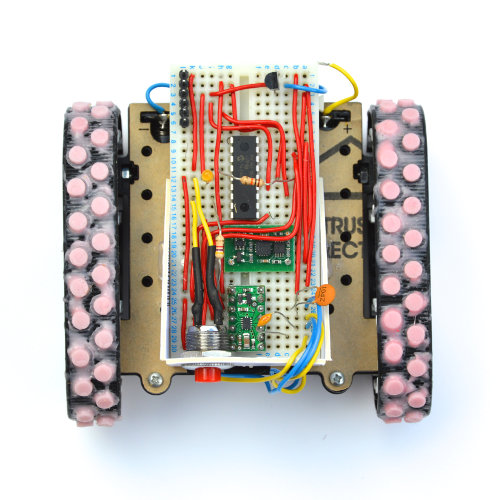
The bot uses a Pololu Zumo as the chassis (which is intended for robot-sumo). The Zumo is nice and simple; an ABS chassis that houses four AAs and on each side; a sprocket (driven by a micro metal gearmotor), idler and silicone track.
This bot uses a neodymium magnet glued to its belly, positioned to be fractionally above the whiteboard's surface. The magnet (rated at 5.5kg) pulls the bot into the whiteboard, and the silicone tracks provide friction that keep the bot in place.
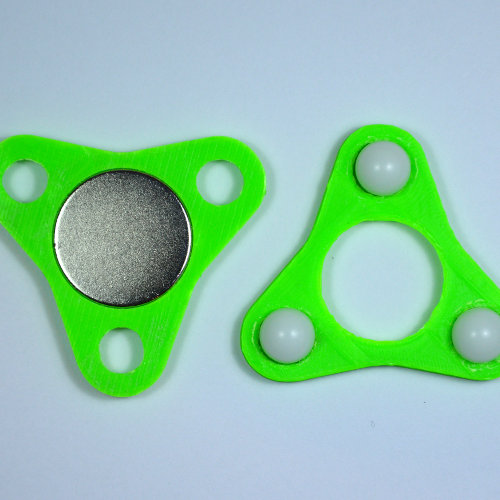
On glass, the bot uses another magnet on the far side of the glass. This works well on 5mm thick glass, but the force between two magnets decays significantly over a gap, so more magnets would be needed for double glazing.
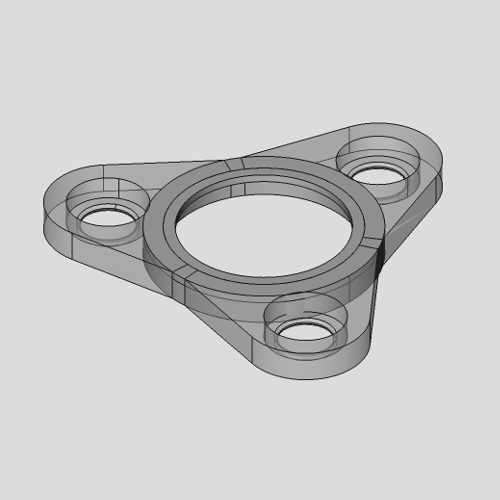
To use the bot on a window, I modelled and printed (at So Make It, Southampton's makerspace) a kind of trolley, which rolls on plastic bearings and lifts a second magnet slightly above the window's surface (on the far side from the bot).
You can buy the Zumo with a shield for an Arduino, but it's a bit pricey for a spare time project. This bot uses a Microchip PIC16F1847 (£1.30) and a TI DRV8835 dual motor driver (£4.50 for Pololu's breakout board) to control the tracks.
The '16F1847 has two independent 'CCP' modules, which the PIC's code controls to change the duty cycle applied to each motor (via the TI driver). For example, the C function that sets the left motor's speed looks like this:
void left_motor_speed(left_speed) {
    PR2 = 249; //Set period
    T2CON = 0b00000001; //Enable timer and set prescale to 4 (1kHz)
    CCP1CON = 0b00001100; //Set LSBs of duty cycle to 0
    CCPR1L = left_speed;
    T2CONbits.TMR2ON = 1;
}
Some slippage is inevitable when rolling up and down vertical surfaces, which can sent the robot off course (if one track slips more than another). I wanted to be able to tell if the robot had wandered off course and correct it.
To do this, I added a two axis accelerometer module (a ACCM2G made by Dimension Engineering, at about £15, the same as the Zumo chassis) to the bot and wired the outputs to the PIC's Analogue to Digital Converter (ADC).
This gives the robot the ability to tell which way it's facing, and allows functions that turn the bot until it's pointing up, down or any angle. It also allows the bot to check its orientation when moving, and make any necessary adjustments:
void forward_north_straight() {
    left_speed = 187; //Set motors to 75%
    right_speed = 187;
    while (1) { //Do this forever
        motor_left_forward(left_speed); //Travel forward
        motor_right_forward(right_speed); //Travel forward
        if (is_quadrant() == 1 || is_quadrant() == 2) { //If we're pointing north-east or south-east
            left_speed = 137; //Set left slower
            right_speed = 237; //Set right faster
        } else if (is_quadrant() == 3 || is_quadrant() == 4) { //If we're pointing north-west or south-west
            left_speed = 237; //Set right slower
            right_speed = 137; //Set left faster
        }
    }
}
One idea was for the bot to clean windows, but the Zumo's tracks are fairly slick and tend to slip on wet glass. I tried two ways to make tracks with treads which would allow any water trapped between the track and the glass to run away.
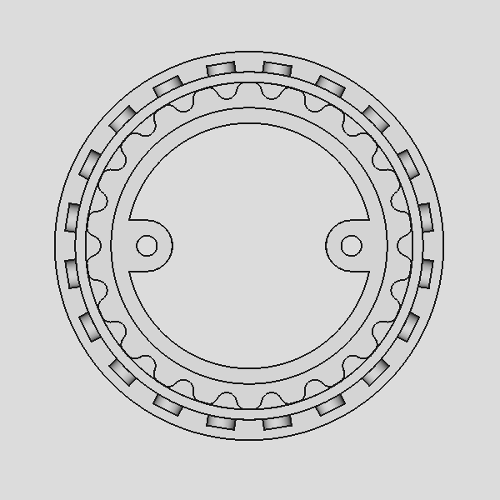
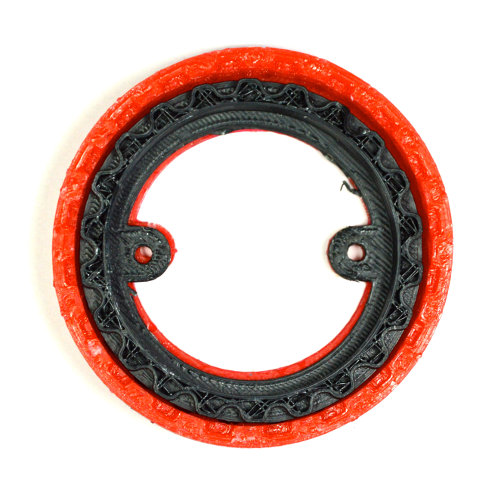
First, I modelled and printed a mould that would let me cast my own Zumo tracks. The inner mould provided the pattern required to let the Zumo's sprockets drive the track, and the outer mould had the pattern of the tread.
The mould worked well; I cast a treaded track close in size to the Zumo's tracks. Unfortunately the silicone I used was too stretchy (30A, I reckon the official Zumo tracks are about 50A), and my tracks sagged and slipped from the sprockets.
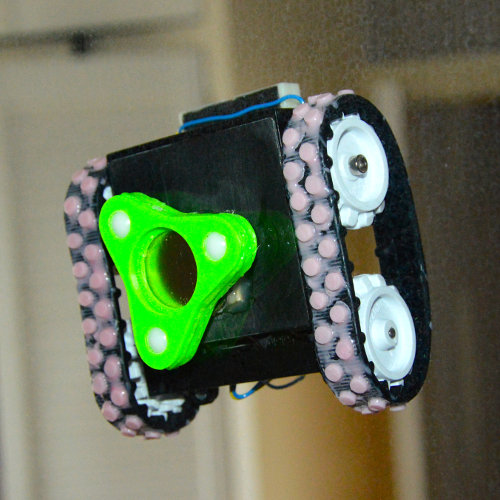
My second shot was less refined but a bit more effective. I cast slightly softer (25A) silicone into the bottom of a Lego part, which gave me lots of tiny silicone cylinders, which I bonded to the official tracks with more silicone.

Changing the tracks gives the bot a bit more tread, but there's still some slipping in wet conditions, so I'll have to think again if I want the bot to do any cleaning in future.
And that's as far as I've got! I'll update this page when I get some time to develop the bot a little more.